Project number: POIR.01.01.01-00-1189/21-00


Presentation Video - ONE-CARE® PRO Safety Needles

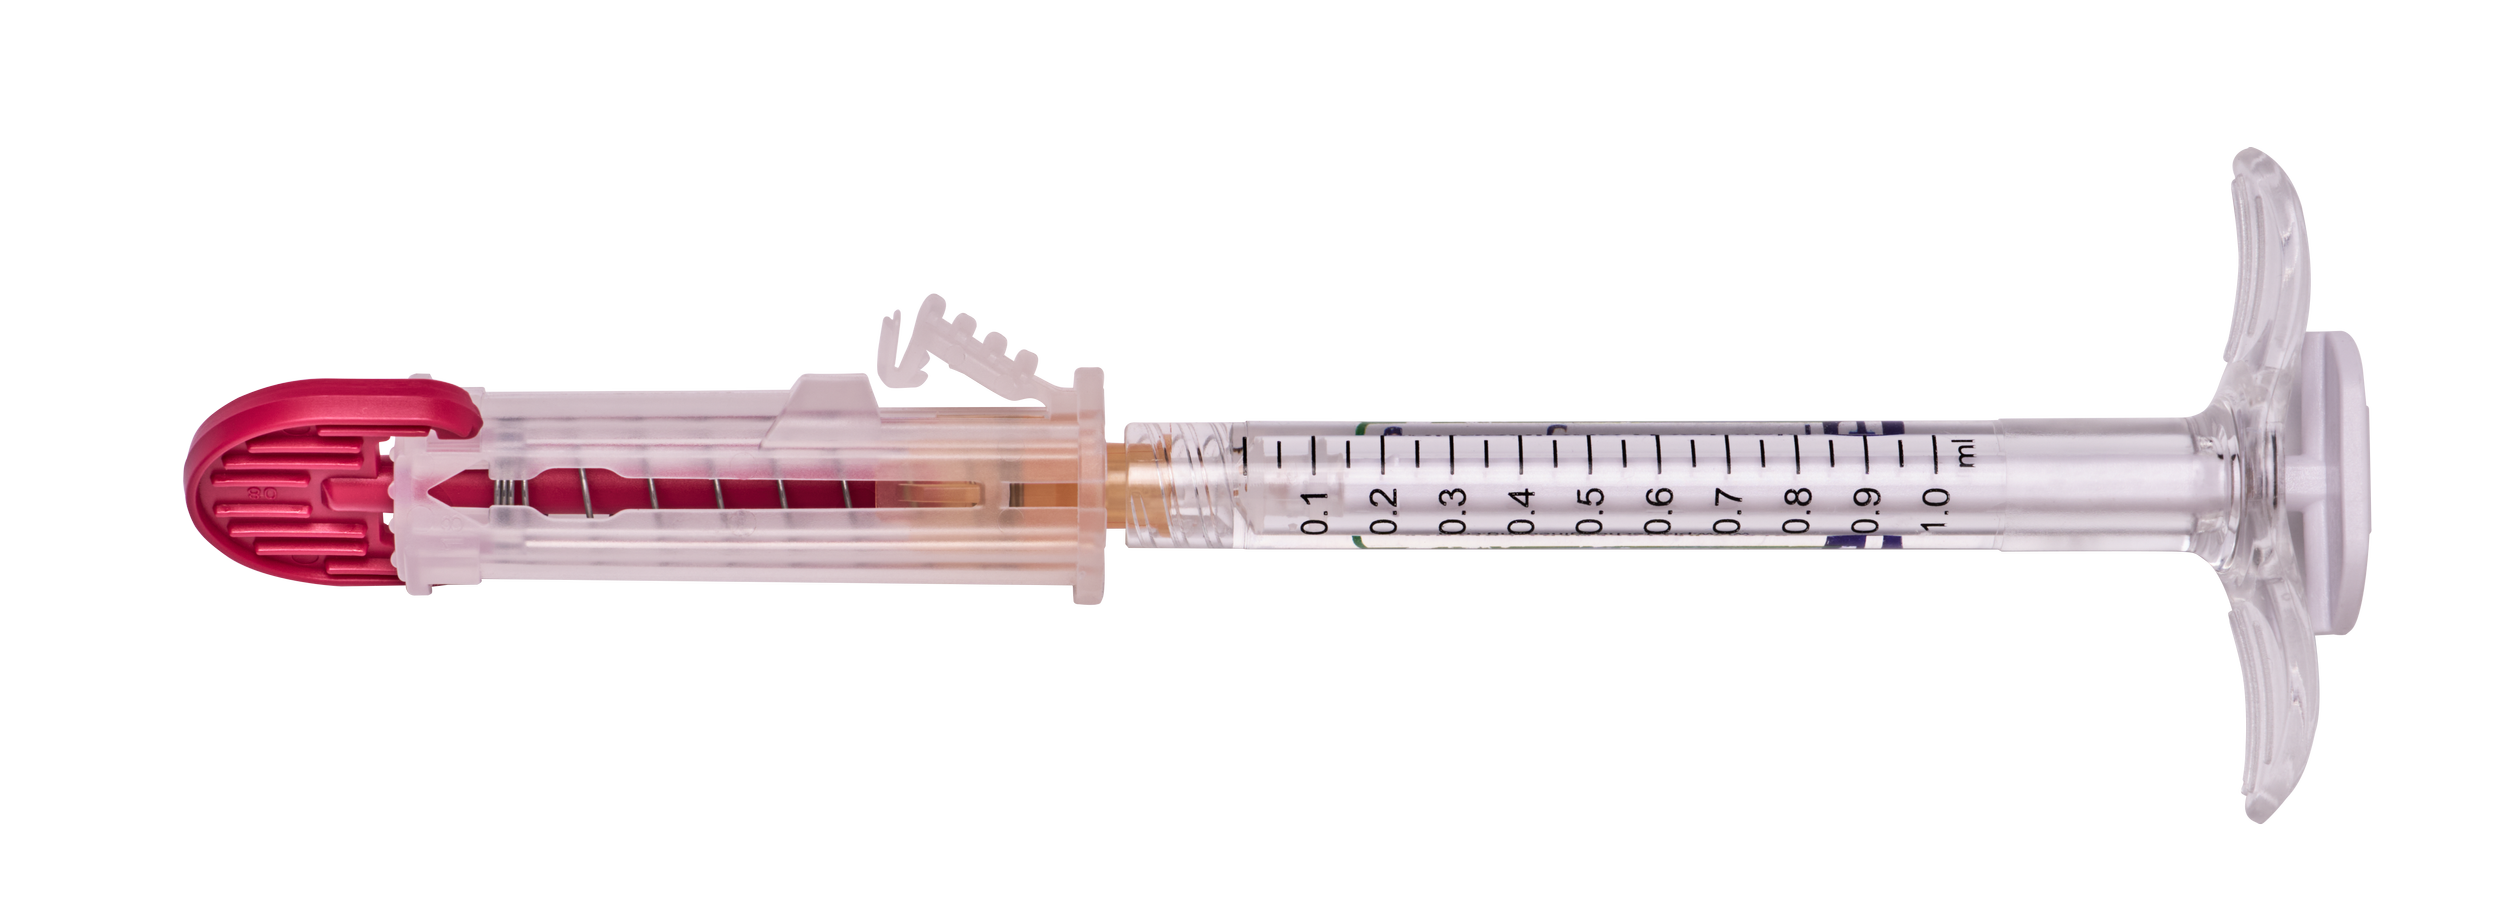
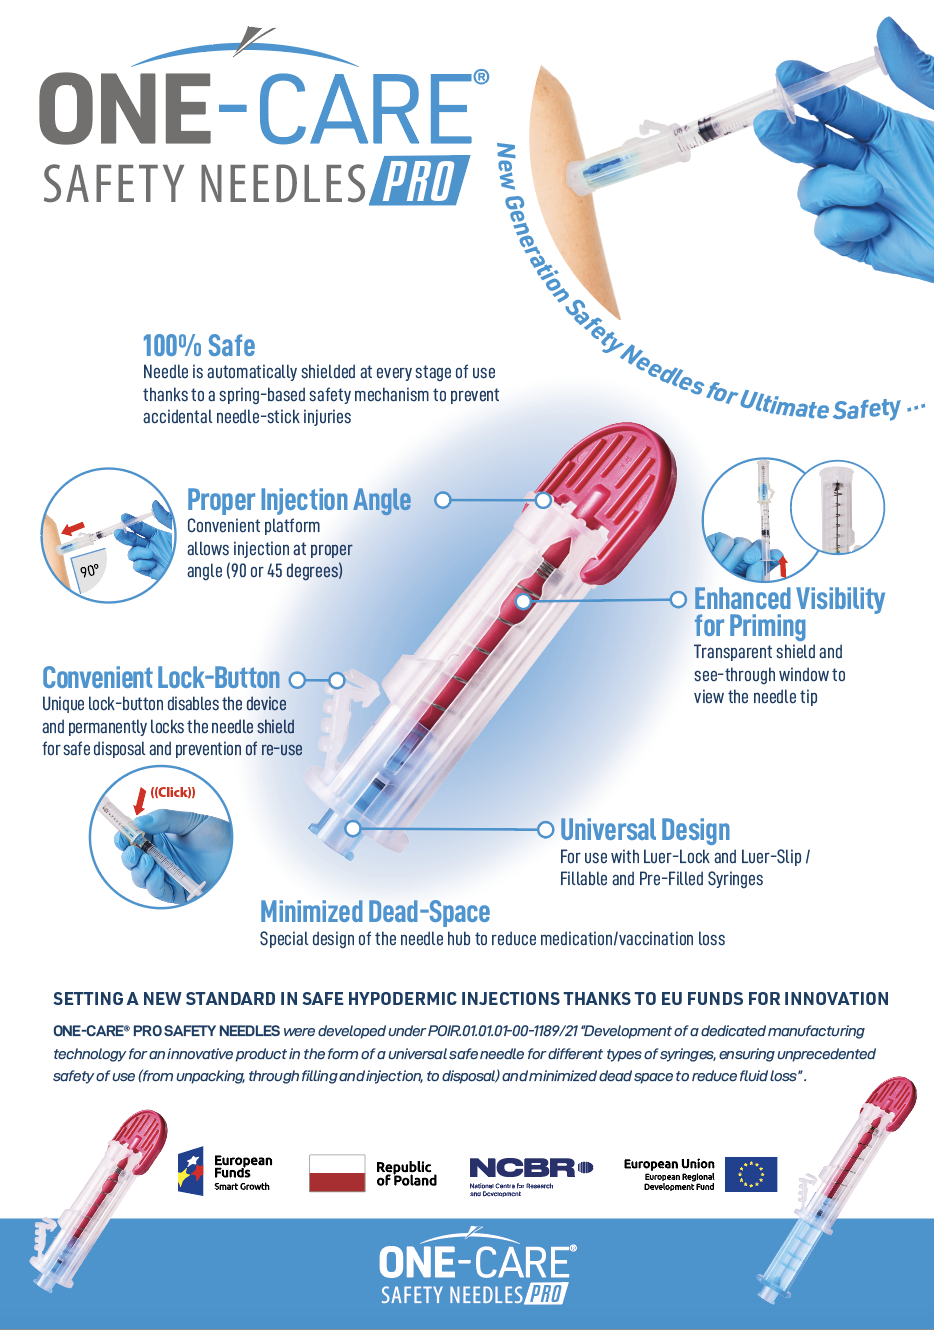
ONE-CARE® PRO Safety Needles
ONE-CARE® PRO Safety Needles

100% Safe
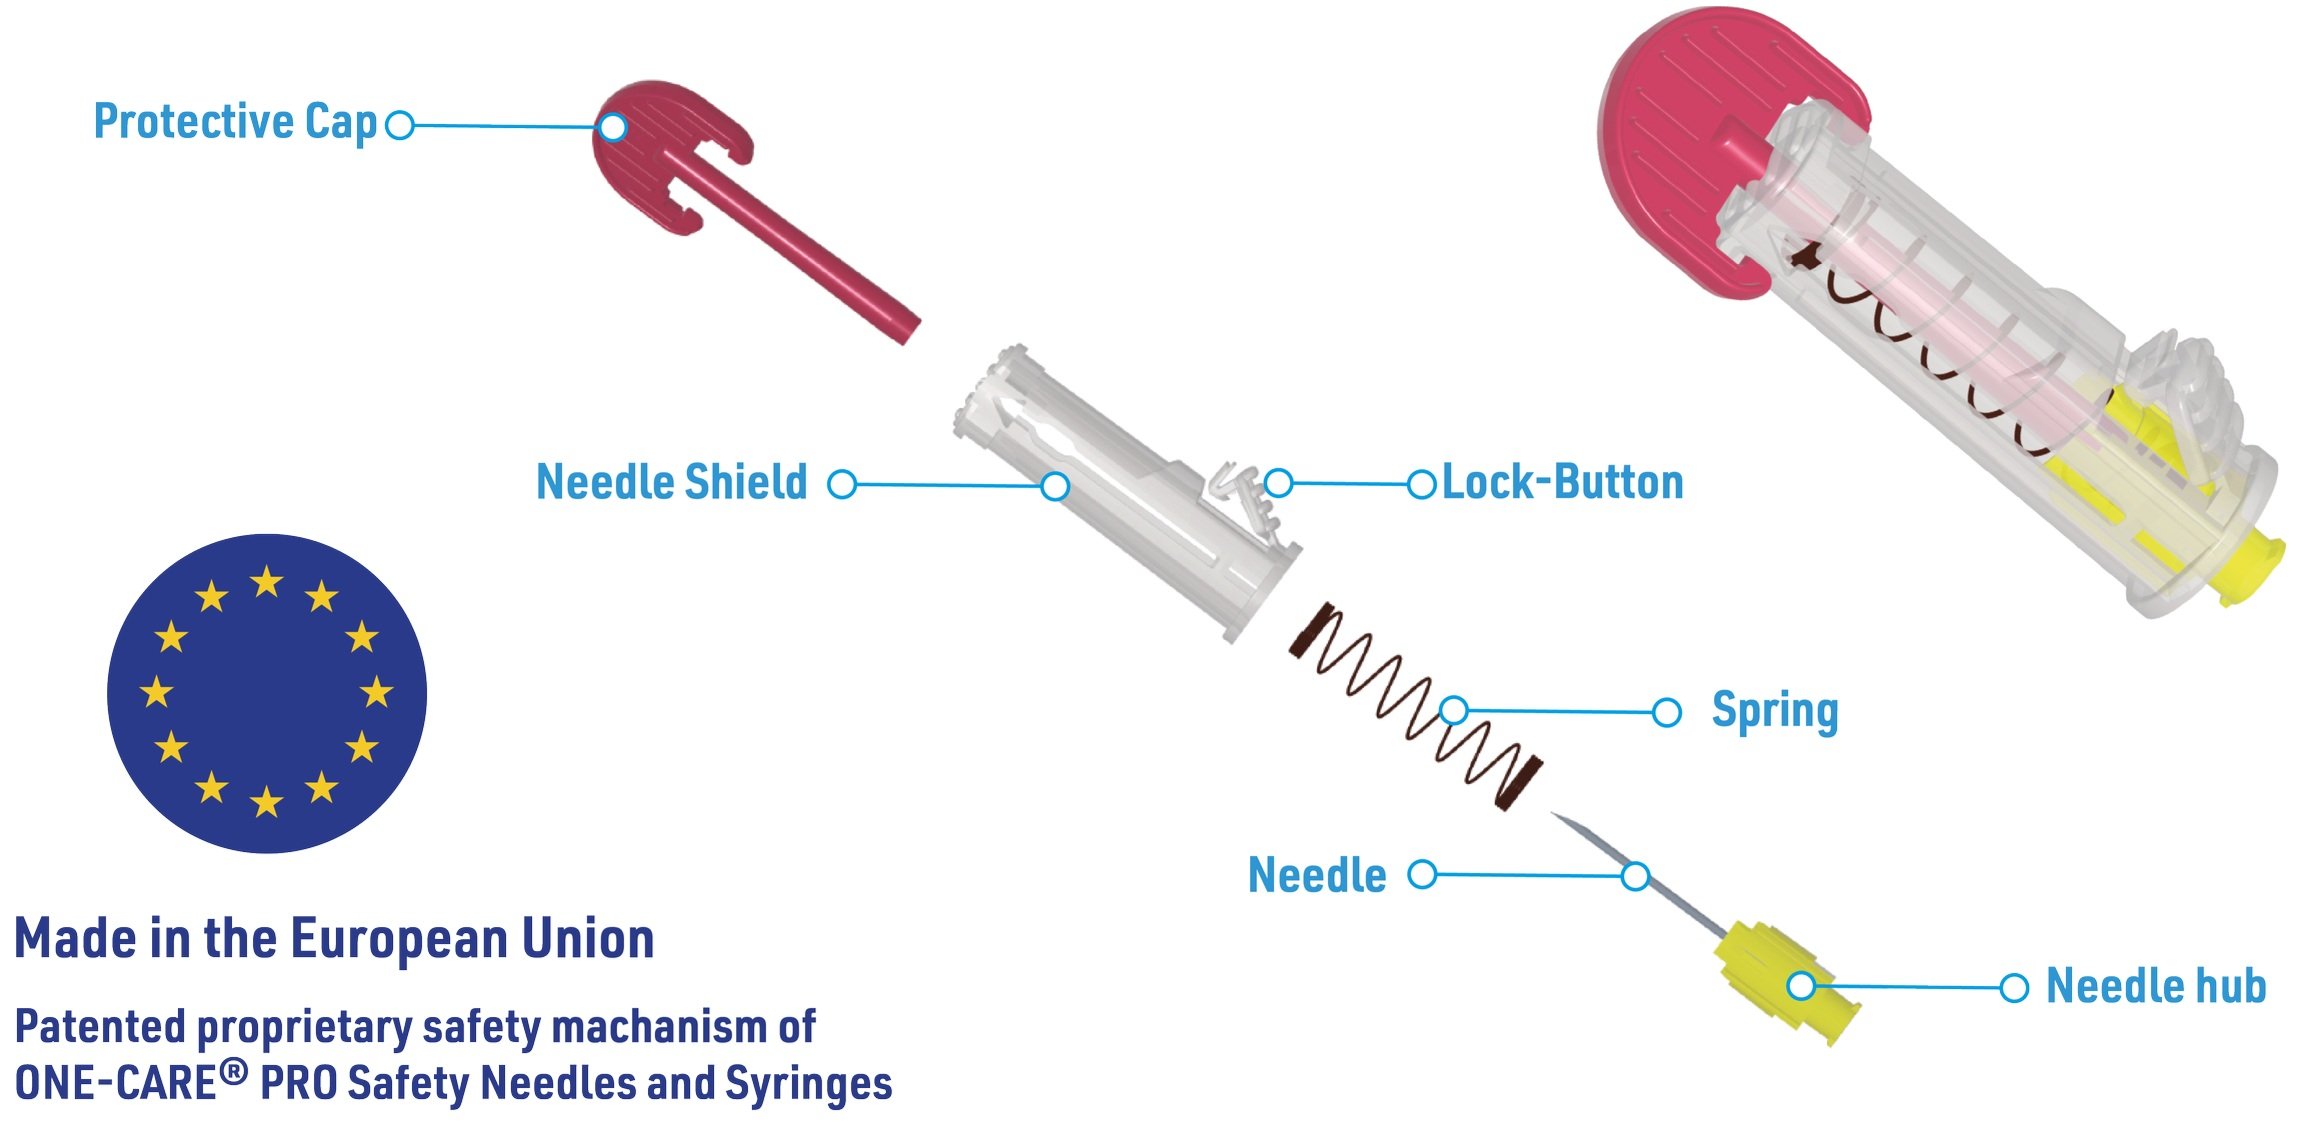
Needle is automatically shielded at every stage of use thanks to a spring-based safety mechanism to prevent accidental needle-stick injuries
Minimized Dead-Space
Special design of the needle hub to reduce medication/vaccination loss
Universal Design
For use with Luer-Lock and Luer-Slip
/ Fillable and Pre-Filled Syringes
Convenient Lock-Button
Proper Injection Angle
Easy Priming

Unique lock-button disables the device and permanently locks the needle shield for safe disposal and prevention of re-use
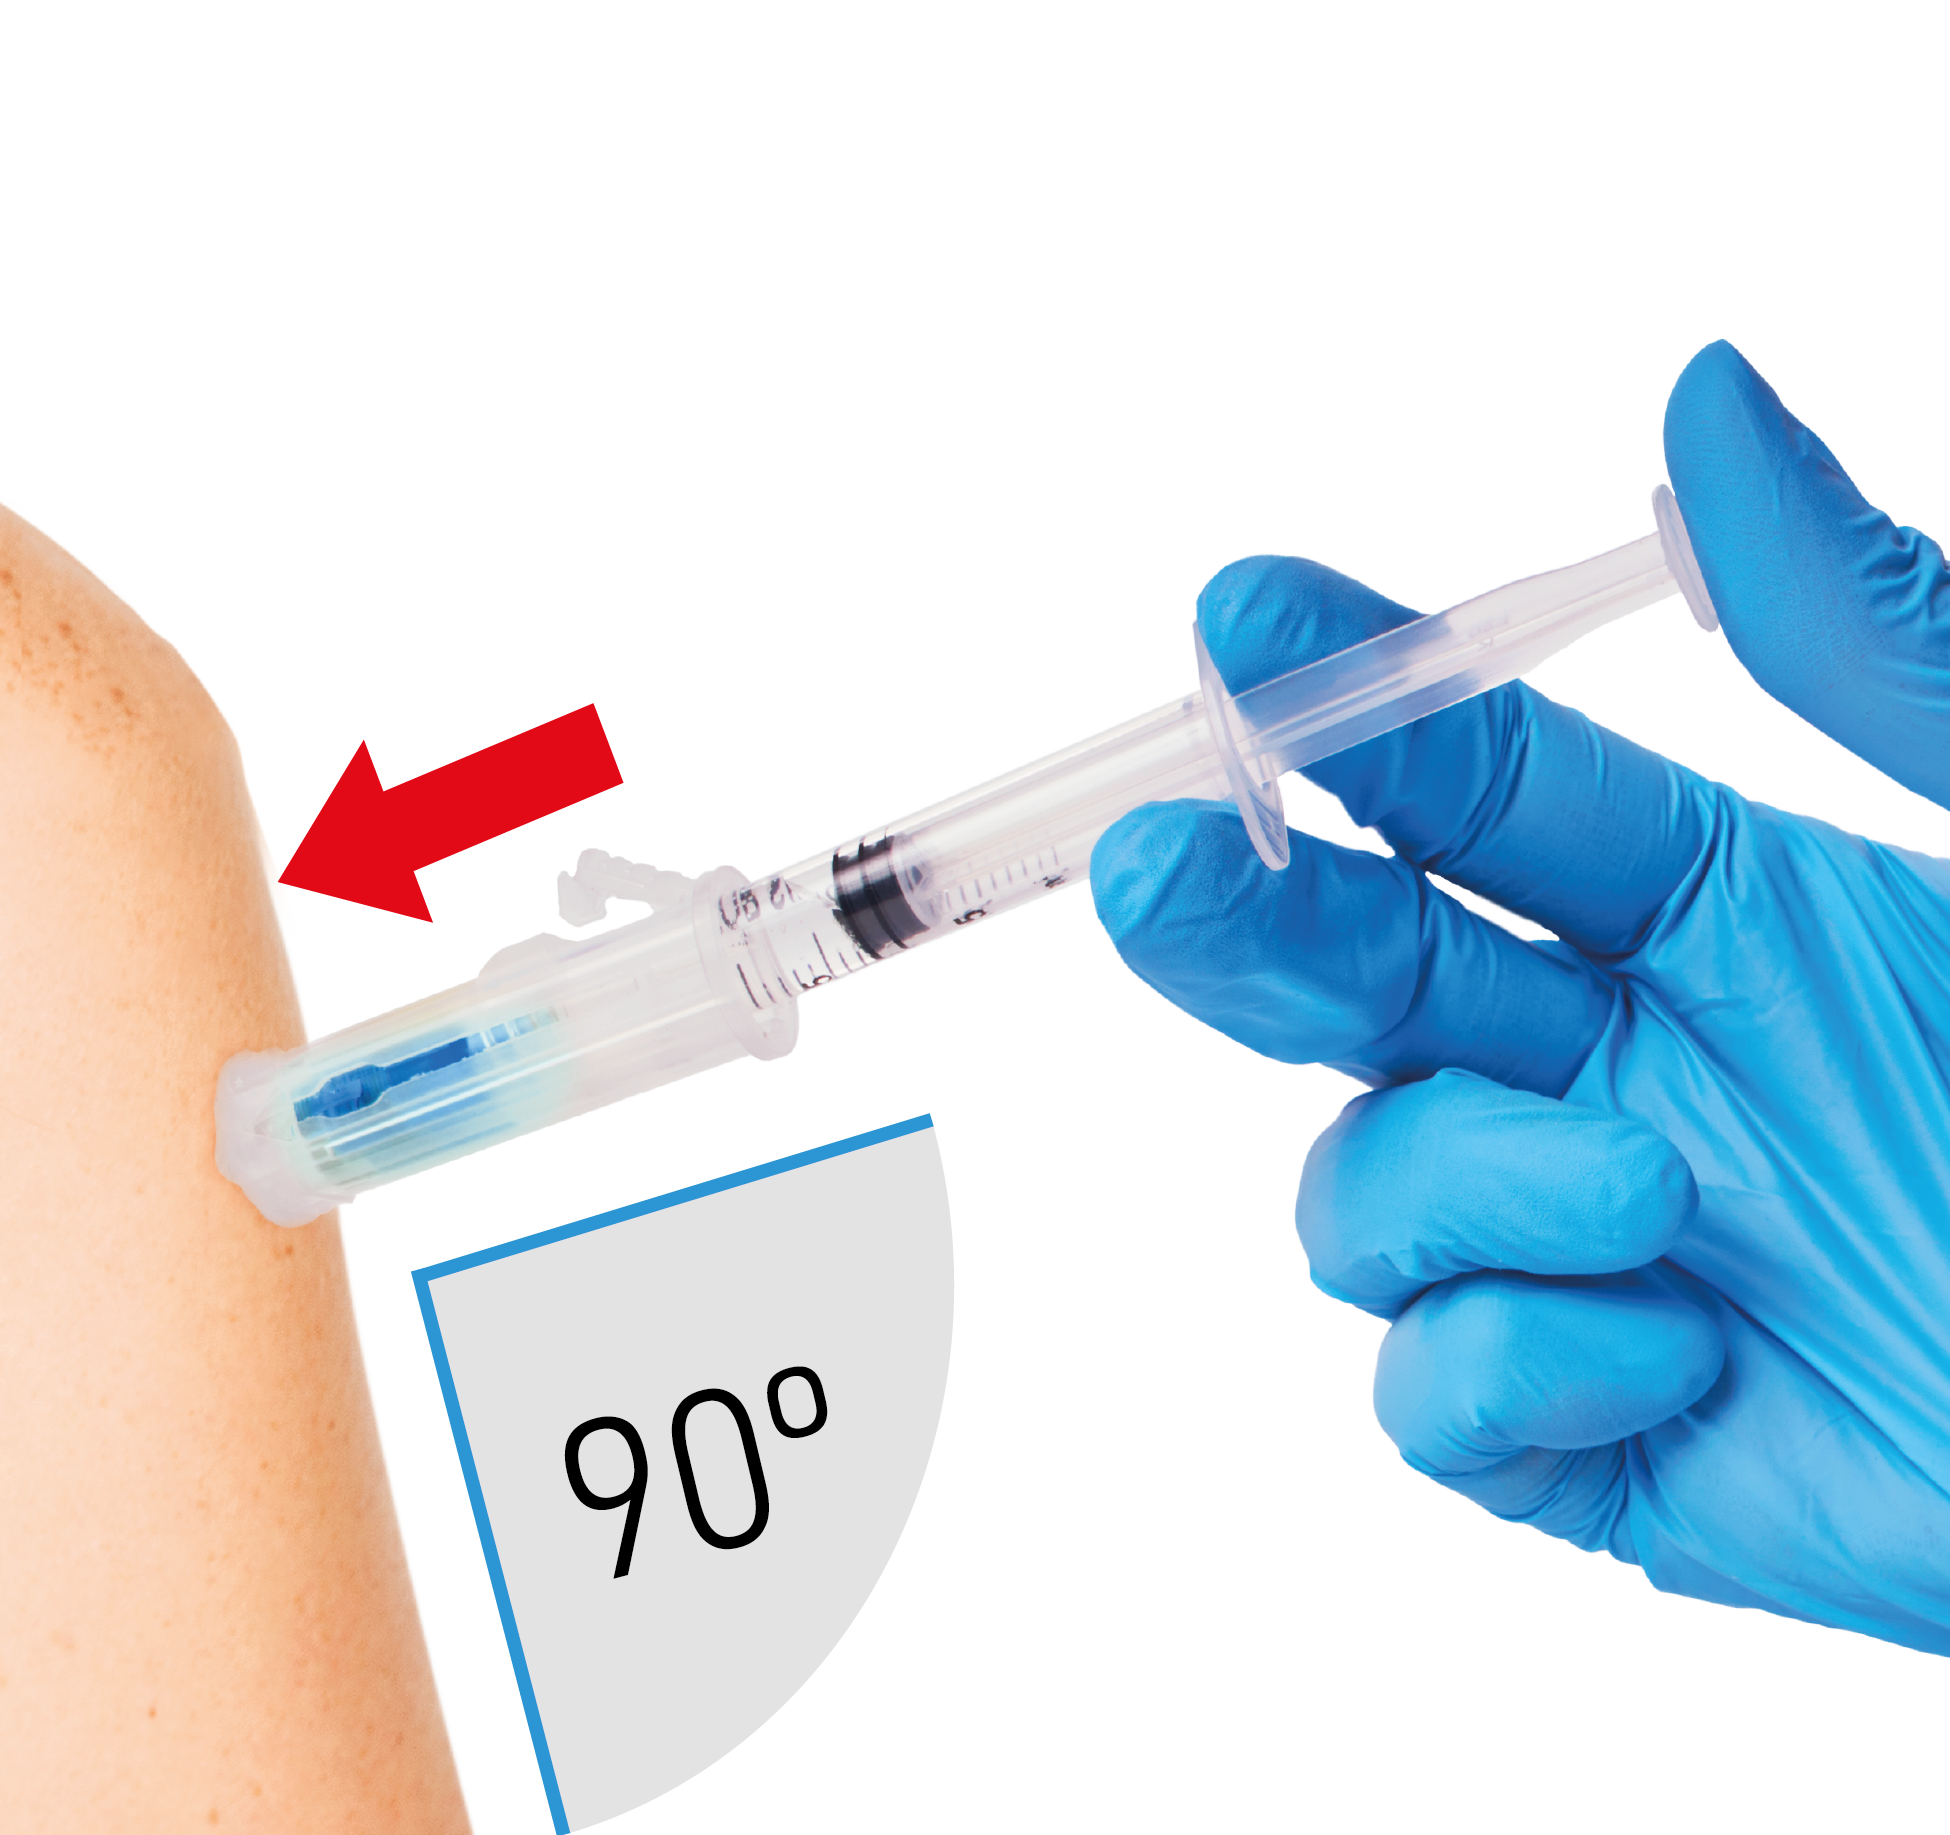
Convenient platform allows injection at proper angle (90 or 45 degrees)

Transparent shield and see-through window to view the needle tip


3D Animation - ONE-CARE® PRO Safety Needles
Instructions For Use
1. Open blister pack aseptically.
Attach safety needle to syringe securely by inserting the needle hub onto (2a) Luer-Slip syringe or turning it onto (2b) Luer-Lock syringe
(2b)
3. While holding the needle shield in place other than lock-button, turn the pink protective cap (3a) and pull it straight out from the transparent shield (3b).
(3b)

4. Position the safety needle shield on the selected injection site at desired angle* and depress syringe barrel to retract the shield so that the needle can penetrate the skin to the full length.

*Depending on type of application, position the shield platform at:
4a) 90-degree without skin pinching (IM – intra-muscular injection),
*Depending on type of application, position the shield platform at:
4b) 90-degree with skin pinching (SQ – subcutaneous injection), or
4c) 45-degree with skin pinching (SQ – subcutaneous injection).
5. Press syringe plunger slowly and deliver the desired dose.
6. Remove from the injection site and immediately press the lock-button until you hear “Click’’, which means that the device has been permanently disabled.
7. Dispose of the device into sharps container as per your local facility’s regulations.

Ordering Information